How We Created a Production Web App Utilizing OpenAI API
Recently, we have created a comprehensive web application with an AI-powered resume builder. In this article, I shared my complete journey in developing AI powered web applications.
Since OpenAI’s release of ChatGPT (Chat Generative Pre-Trained Transformer), it has had an unprecedented impact across all industries, especially in IT.
Developers around the world began developing AI-based applications, and even big companies like Microsoft, Quora, and Product Hunt Daily began adapting this large language model.
It would not be wrong to say the AI market exploded and started a chain reaction. In the US alone, 14700 startups were founded until March 2023, most of which are powered by ChatGPT AI. So is it too easy to make AI-powered applications? Are those apps delivering any real value?
At Technext, we also created a production web application utilizing ChatGPT API, and as the lead developer of the project, I can say it is possible to build AI-powered applications that solve users’ problems and provide real value to them.
Don’t get me wrong, building such apps is not easy as ABC, and you can’t make one in 20 minutes, as they say in their YouTube Videos.
In today’s article, I will share the complete journey of our AI-powered web application development. Let’s get started!
What have we built?
You probably already know that Technext provides software development outsourcing services. One of our clients was a Canadian ed-tech startup. They help international students and newcomers land ideal jobs in less than 15 weeks. They do this through skill-based boot camps, workshops, webinars, events, on-one-on coaching, and a job search academy.
The startup needed a WebApp that could assist its students in their career journey. They wanted features like courses and tutorial hub where students could find and gain the required skills to get a job.
A straightforward event management platform where they can create and share events for their students.
A simple newsletter solution to keep their students up to date about the industry.
Last but not least, a powerful resume builder so that students can make personalized and winning resumes. As I said, developers around the world are trying to solve problems using AI. We, too, implemented AI for this resume builder.
You may say anyone can make a resume using the free ChatGPT app; why would I need another application to do the same thing?
Well, while anyone can create their resume using ChatGPT for free, not everyone can make a winning resume. The secret is hidden in prompt engineering; if you give ChatGPT a subpar prompt like “Write a resume for software engineer,” then it will provide you with a generalized resume, which is no better than garbage.
We aimed to build an Application that can take all the necessary information from the user and create a personalized resume tailored to specific job requirements.
The Back Story (Read it, it’s interesting)
Back in January, One CNN article titled “ChatGPT passes exams from law and business schools” caught my attention, and I thought about how this tool will impact the legal world. After a brief research, I found there are multiple applications in existence that provide legal help.
Right after that, I thought of starting a hobby project to build an AI-powered web application utilizing ChatGPT API. Although I did in-depth research on how this AI-powered language model works, I could not manage enough time to finish the project.
The opportunity finally came when one of our clients(the company I work for provides offshore development services) asked us to develop an AI-powered resume builder. Our client, the
Canadian Ed-Tech startup provided us with all the necessary instructions related to building a better resume, and our job was to create an application using AI.
By that time, they had helped more than 20K students, so they knew what mistakes students usually make while writing a resume and which skills and aspects students need to reflect on the resume to get a job. So, providing the requirements wasn’t hard for them.
Project Challenges
- Personalized Resumes: Developing an easy-to-use Resume Builder that adjusts to various career trajectories. Creating algorithms that dynamically adjust CV content to sectors and positions, recommending keywords, and emphasizing unique abilities.
- AI-Powered Scans: Implement powerful artificial intelligence for resume scanning. Create algorithms that grasp context, trends, and job descriptions in order to more properly evaluate candidates and reduce false positives.
- Scalable Architecture: Design a strong multi-tenant infrastructure. As the platform handles more users and grows, ensure data segregation, appropriate resource distribution, and a pleasant user experience.
- User-Friendly Interface: Create an easy-to-use interface for both job searchers and institutes. Integrate Resume Building, Scan, and Job Search seamlessly, and collect user comments for continued development.
Before development
Before you start developing the application, you need to access and decide a few things based on user/client requirements. I’m not going to explain everything we did before we went into development, but I think I should share some key things we considered before we started development.
Choosing the tech stack
It was the first thing we settled on. After discussing the project requirements and timeline, we finalized the tech stack for the project. Of course, you can choose from a wide range of development technologies, but why you choose a tech matters.
Here is what we used for the project and why:
Next JS
We used the Next JS framework of React JS to develop the front end. The client required the web application to be scalable, and we know we can provide a well-structured and scalable solution using Next JS.
Moreover, the client wanted the app to be organically crawled and displayed by Google. To improve its SEO, we had to choose one from the end solution that can pre-render web pages and provide good performance simultaneously. As we can do both using Next JS, there was no reason to choose anything else over it.
Amazon Amplify
For the back end, we went for Amazon Amplify. Using this Backend as a Service (BaaS), we created the APIs we needed. The project had a minimal development timeframe, and we had to do much work within only 90 days. That was the main reason to choose a BaaS platform.
The client also wanted to stay within the AWS environment to reduce costs, so we did not consider other BaaS platforms.
Choosing the Right Mode and Model of OpenAI
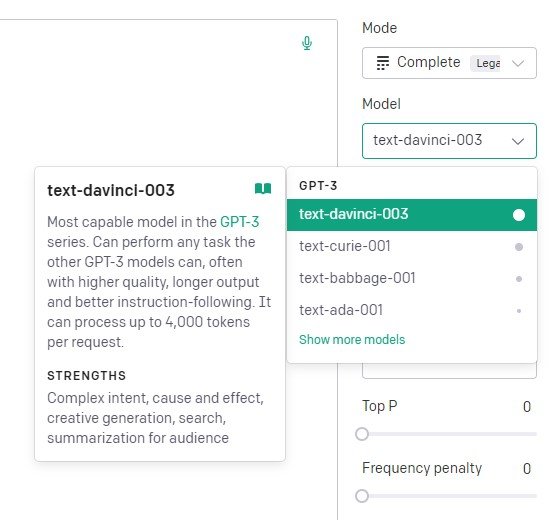
Open AI has multiple Modes and Models specialized for different tasks. Their price range also varies. So, before starting the development, it’s important to decide which OpenAI mode and model to implement. To know about this topic, you may read OpenAI documentation.
We chose text-davinci-003 for our project as it is the most powerful model in GPT 3 series, and our app resume builder needed the capability to process complex intent.
Calculating usage and API cost
Although thousands of apps are being built using the open AI API, we still don’t have enough data on the size of the market. Plus, many new applications are being built without considering the API cost. So, I guess a huge number of free or low-cost apps will not be able to continue their journey for the long term.
Therefore, it is crucial to calculate the cost of the token before starting development. In fact, you can keep the API cost below the tolerable limit simply by enforcing the input and response token limit.
In our case, the client provided us with an approximate budget, and we calculated our expected token expanse and configured it accordingly.
Technical implementation and control Mechanisms
After we figured out all the prerequisites, we started the technical implementation, and for that, we also defined the control mechanism. Here’s how you can do that:
Technical Implementation:
- API Integration: Begin by integrating OpenAI’s API into your application. You’ll need to set up authentication, handle API requests, and process responses.
- User Interface (UI): Design a user-friendly interface where users can input their information, such as personal details, work experience, education, skills, and job preferences. This interface should also allow users to customize the output.
- Data Preprocessing: Clean and preprocess user inputs before sending them to the AI model. Convert the input data into a format that the model can understand and process effectively.
- Prompt Crafting: Construct prompts that provide context to the AI model about the user’s requirements. For instance, you can instruct the AI to generate a resume for a specific job role or industry.
- Response Handling: Once you receive the AI-generated response, process and extract the relevant parts to create the resume content. You might need to fine-tune the response to ensure accurate and coherent results.
- Dynamic Formatting: Implement a formatting module that structures the content into sections, adds bullet points, adjusts fonts, and organizes the layout to create an appealing and professional resume.
- Keyword Optimization: Develop a module that identifies keywords from the job description and strategically incorporates them into the resume content. This helps improve the resume’s chances of passing through ATS systems.
- Feedback Loop: Allow users to provide feedback on the generated resume. Positive and negative feedback can be used to fine-tune the AI model and enhance future outputs.
Control Mechanisms:
- User Input Validation: Implement validation checks to ensure that user inputs are accurate and complete. Prevent errors by guiding users to provide essential information.
- Customization Options: Offer users the ability to customize the AI-generated content. This might include options to reorder sections, add specific details, or emphasize certain accomplishments.
- Content Relevance: Develop mechanisms to evaluate the relevance of AI-generated content. Ensure that the generated resume accurately reflects the user’s skills and experiences.
- Bias Mitigation: Train the AI model on diverse and inclusive datasets to mitigate potential biases in the generated content. Regularly review and update the training data to improve fairness.
- Quality Assurance: Implement a quality control process to review and validate the AI-generated resumes. This can involve a combination of manual and automated checks to ensure the content meets industry standards.
- Feedback Incorporation: Use user feedback to continuously improve the AI model. Integrate a feedback loop that refines the model based on user suggestions and corrections.
- User Guidance: Provide clear instructions and guidance to users on how to interpret and modify the AI-generated content. Educate users about the capabilities and limitations of the AI-powered resume builder.
Building the WebApp using Next.JS (Step by Step)
Implementing an AI-powered resume builder using OpenAI’s API in a Next.js application involves several steps. Here’s a high-level guide on how you can approach this implementation:
Step 1: Set Up Your Next.js Project
Start by creating a new Next.js project if you haven’t already. You can use the following commands to set up your project:
npx create-next-app my-resume-builder
cd my-resume-builder
Step 2: Obtain OpenAI API Key
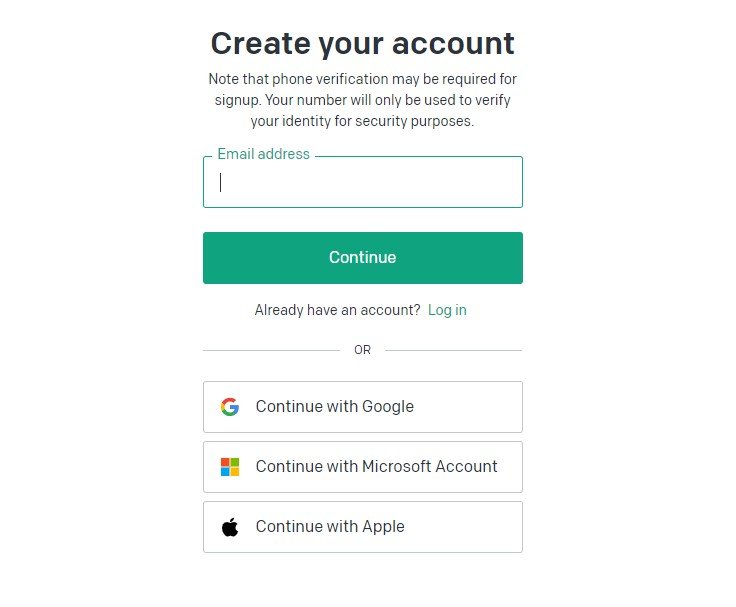
Sign up for access to OpenAI’s API and obtain your API key. You’ll need this key to make requests to the API.
Step 3: Create API Functions
In your Next.js project, create API functions to interact with OpenAI’s API. Inside the pages/API directory, create a file named generateResume.js (or any other suitable name):
// pages/api/generateResume.js

import { getResume } from '../../lib/openai'; // Implement the OpenAI API interaction here

export default async function handler(req, res) {
  if (req.method === 'POST') {
    try {
      const { input } = req.body;

      // Call the OpenAI API to generate resume based on input
      const generatedResume = await getResume(input);

      res.status(200).json({ resume: generatedResume });
    } catch (error) {
      res.status(500).json({ error: 'An error occurred' });
    }
  } else {
    res.status(405).json({ error: 'Method not allowed' });
  }
}
Step 4: Create a User Interface
Design a user interface where users can input their details and trigger resume generation. You can use HTML forms, React components, and styles to create an appealing UI.
Step 5: Make API Requests
In your React component, make an API request to your generateResume API when the user submits their information. You can use libraries like axios or the built-in fetch API to make the request. Don’t forget to handle loading states and errors.
import React, { useState } from 'react';
import axios from 'axios';

function ResumeBuilder() {
  const [input, setInput] = useState('');
  const [resume, setResume] = useState('');
  const [loading, setLoading] = useState(false);
  const [error, setError] = useState(null);

  const generateResume = async () => {
    try {
      setLoading(true);
      setError(null);

      const response = await axios.post('/api/generateResume', { input });
      setResume(response.data.resume);
    } catch (err) {
      setError('An error occurred');
    } finally {
      setLoading(false);
    }
  };

  return (
    <div>
      <textarea
        value={input}
        onChange={(e) => setInput(e.target.value)}
        placeholder="Enter your details..."
      />
      <button onClick={generateResume} disabled={loading}>
        Generate Resume
      </button>
      {loading && <p>Generating...</p>}
      {error && <p style={{ color: 'red' }}>{error}</p>}
      {resume && <div>{resume}</div>}
    </div>
  );
}
export default ResumeBuilder;
Step 6: Styling and Enhancements
Style your UI using CSS or a styling library of your choice to make it visually appealing. You can also add additional features like customization options, formatting controls, and more.
Step 7: Testing and Feedback Loop
Test the application thoroughly to ensure that it generates accurate and relevant resumes. Incorporate user feedback to make improvements and refine the generated content.
Remember that this is a simplified overview of the implementation process. You’ll need to handle more details, such as managing API keys securely, refining the generated content, optimizing the user experience, and deploying your Next.js application to a hosting platform.
Footnote
Well, now you know how we developed the application using OpenAI API. I and my teammates believe it’s a simple application and it’s possible to create next-level applications implementing API.
I will definitely work on more AI-based application development, and If you have similar wishes, please give us a nudge. It would be lovely to have a chat with like-minded people 🙂

